Install NodeMCU
- Download the latest version of the firmware from GitHub, it generally has the file extension .bin. Rename it to nodemcu.bin
- If you like to have a customized, then go NodeMCU custom builds, select the modules you want in your firmware and build one for yourself. Download .bin extension. and rename nodemcu.bin
- Build the circuit for Programming mode or use Dev Kit
- Connect the usb part to the computer.
- Computer assigns a port name to USB-UART. Get that port name.
- Its generally /dev/ttyUSBS0 on Linux computer but could be different
- Flash it using the command line
sudo esptool.py --port /dev/ttyUSBS0 write_flash 0x00000 nodemcu.bin
Write and Run a program
- Build the circuit in the programming mode
- Connect the USB part to the computer
- Then open the ESPlorer.jar. Its an IDE and looks like below. On the right panel click big Open button. This will open the connection to ESP8266 (through UART) for communication
- Select the NodeMCU tab on the top left
- Then select the Scripts Tab
- Then type your program
- Then click Save&Run button
- On the right hand command prompt you can see that console showing whats happening
- You will see code being written to ESP8266 and executed on ESP8266. If you had any print statements in the code it will print to this console.
- Initially write very simple Lua code and try to run it.
- Once you are comfortable use the NodeMCU api and write what you want. The screenshot below shows a webserver.
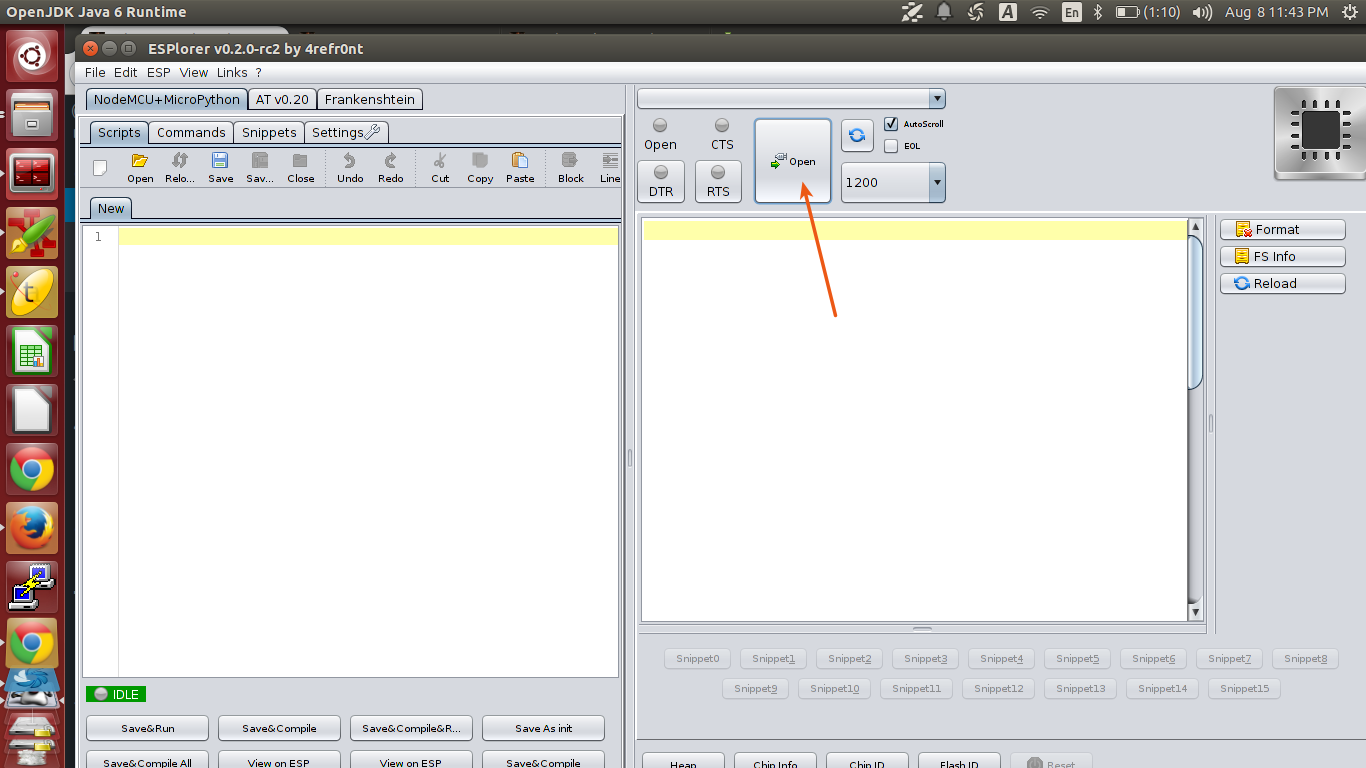
Open a connection to the ESP8266 for communication
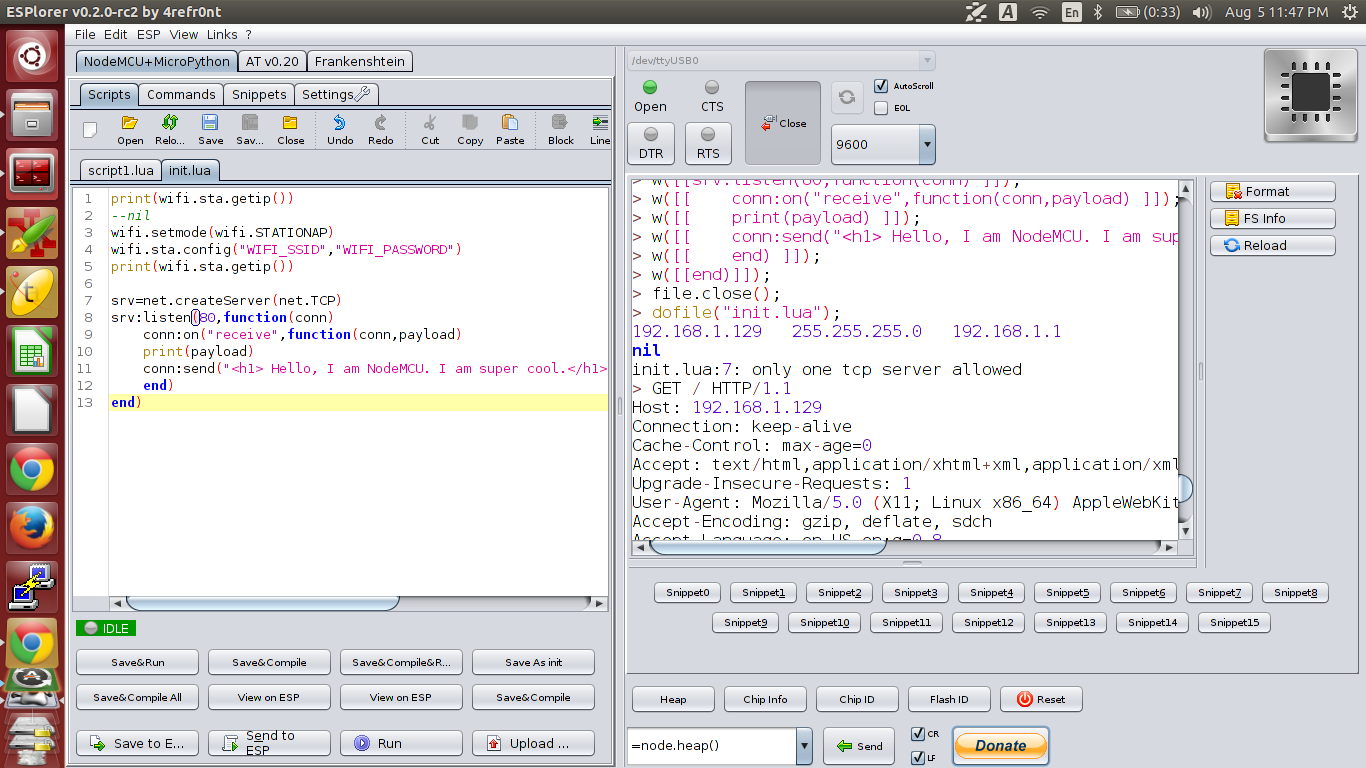
Write the program and click on the Save&Run
Run a program on boot
When you write a program using the ESPlorer, you are also running the program through IDE. But in real world when you deploy the IoT device this won’t be the way. In real world the code should start running as soon as you power-up the device.
So you want to run some code as soon as the ESP8266 boots or switches on. For that to happen create a file called init.lua and write that program in it.
You can also save the existing program as init.lua using the button called “Save As init”.
When ESP8266 is switched on, NodeMCU boots first add as soon as it boots, it runs init.lua. So make init.lua starting point of your program.Connecting to Internet
- wifi.STATION is when the device is connected to another wifi router. This is often done to give the device access to the internet.
- wifi.SOFTAP is when the device is acting as ONLY an access point. This mode will allow you to see the device in the list of wifi networks. In this mode your computer can connect to the device creating a local area network. Unless you change the value, the ESP8266 device will be given a local IP address of 192.168.4.1 and assign your computer the next available IP, such as: 192.168.4.2.
- wifi.STATIONAP is a combination of wifi.STATION and wifi.SOFTAP. It allows you to create a local wifi connection AND connect to another wifi router.
Send data to a webservice
Note: Yet to write
Run a webserver
-- init.lua
-- Update wifi SSID and PASSWORD before trying
wifi.setmode(wifi.STATIONAP)
wifi.sta.config("WIFI_SSID","WIFI_PASSWORD")
print(wifi.sta.getip())

srv=net.createServer(net.TCP)
srv:listen(80,function(conn)
    conn:on("receive",function(conn,payload)
    print(payload)
    conn:send("<h1> Hello, I am NodeMCU. I am super cool.</h1>. You can try this at home. Completely safe.")
    end)
end)