Kickstarting your ML projects using pre-trained models from IBM’s MAX
One of the biggest challenge when you want to use ML in your project is training models using right data. It’ not super tough if you have enough data to build a model but most of the time when I want to quickly experiment, i don’t necessarily have the data for it, forget about good data. This is true when you want to build a product quickly or experiment while trying to learn ML. My solution to this problem is to use existing models to experiment and then build my own at later stage if required. One of the best places to get models is IBM Code Model Asset Exchange.
IBM Code Model Asset Exchange is a a place for developers to find and use free and open source deep learning models. They have all kinds of models, from Breast Cancer Mitosis Detector to Simple Object Detector. They are easy to use in your own projects. In this how-to we will use Simple Object Detector in our application to detect world’s biggest problem whether a given animal is a dog or cat.
There are two parts to our application. First part is to run the Simple Object Detector by building the docker image. It exposes a RESTFul API. Then use that API in your app or by a client.
Bring up the Simple Object Detector – API Server
The model comes as a Docker image with embedded app server which exposes a RESTFul API. To start build the Docker1 image and start it.
git clone https://github.com/IBM/MAX-Object-Detector.git
cd  MAX-Object-Detector
#build the image
docker build -t max-object-detector .
Building the image takes a while as it has to download 2 the image codait/max-base from Docker Hub. Once the image is ready lets start the docker server
docker run -it -p 5000:5000 max-object-detector
This starts the a simple flask server which deploys the model and exposes the a simple API at port 5000. If you are interested in how it’s doing you can check the code at max-base. It uses tensorflow (Python). It reads the tensorflow model from a specific disk path and is ready to serve. In fact if you don’t want to go Docker way then you can run this max-base flask app by downloading the model and data files 3 from IBM Servers. I am going Docker way as it’s easy to get started when you start experimenting.
So getting back to Docker. Once you start go http://localhost:5000/ to see OpenAPI aka Swagger UI. You can use the built in UI to call the APIs, especially model/predict API.
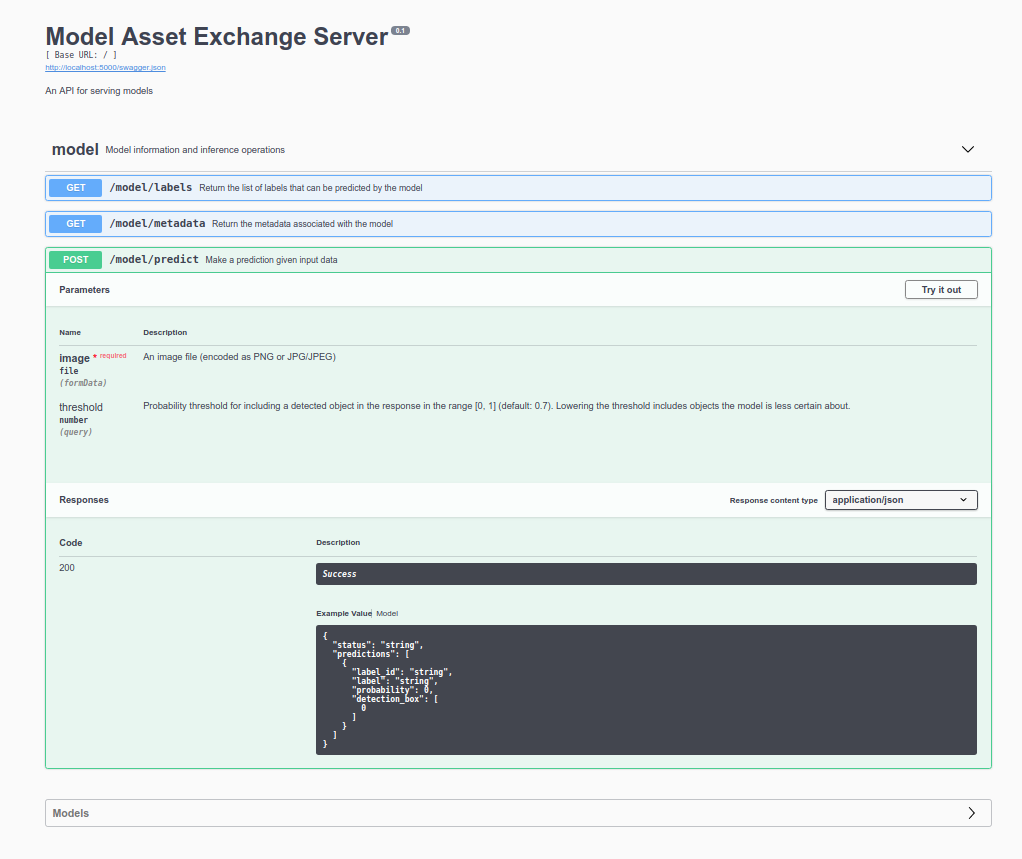
APIs exposed. You can use the built in Swagger UI to browse.
Now that we have the predictor API running. Let’s try it out on our cat and dog pictures. It turns out the predictions were quite good.
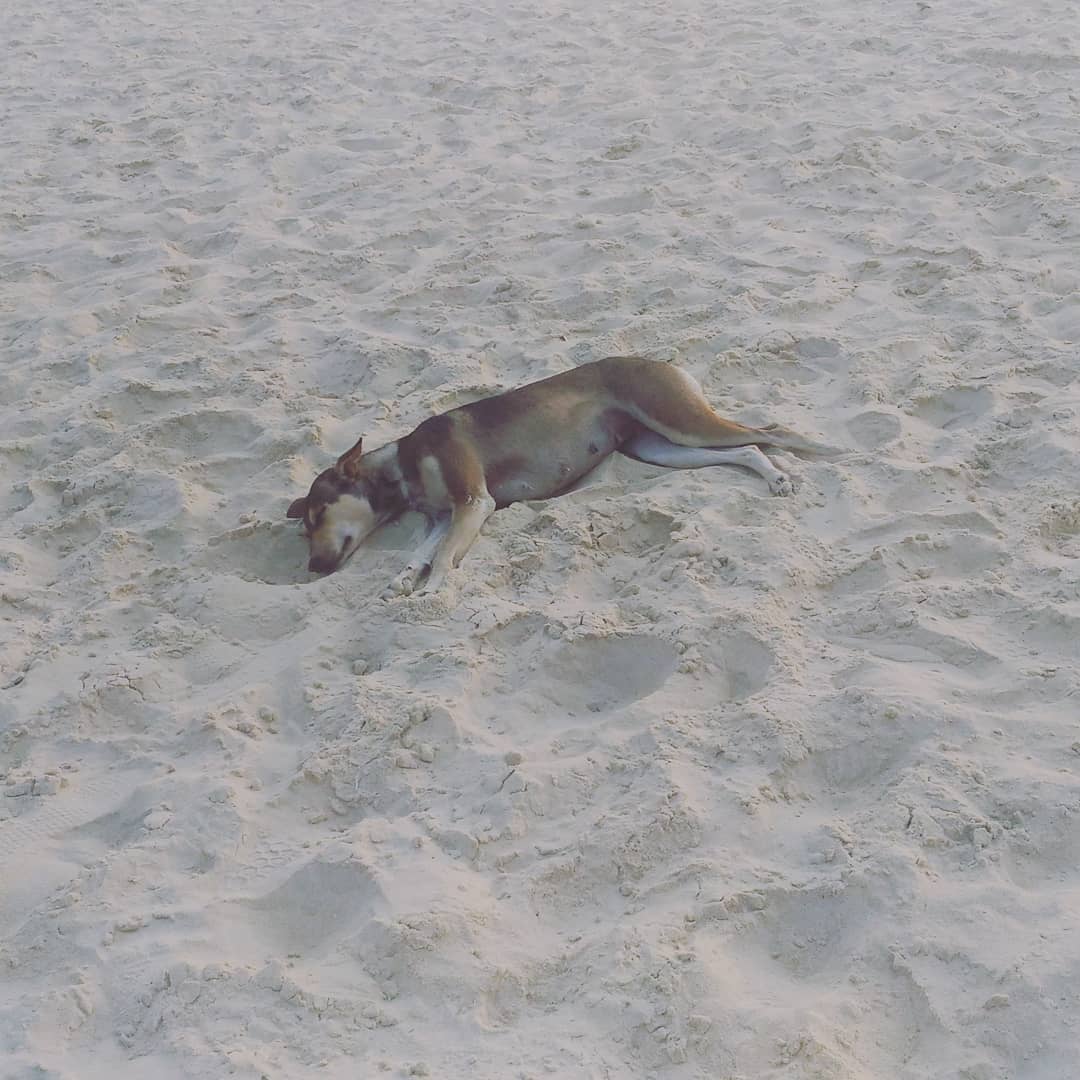
Dog
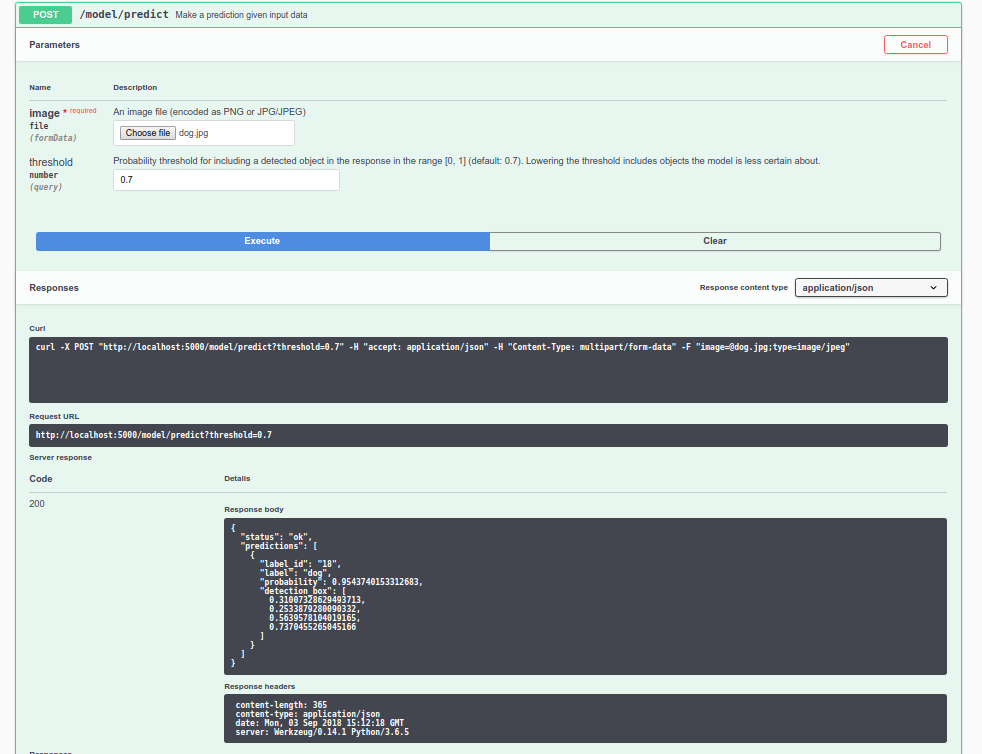
Prediction Dog

Cat
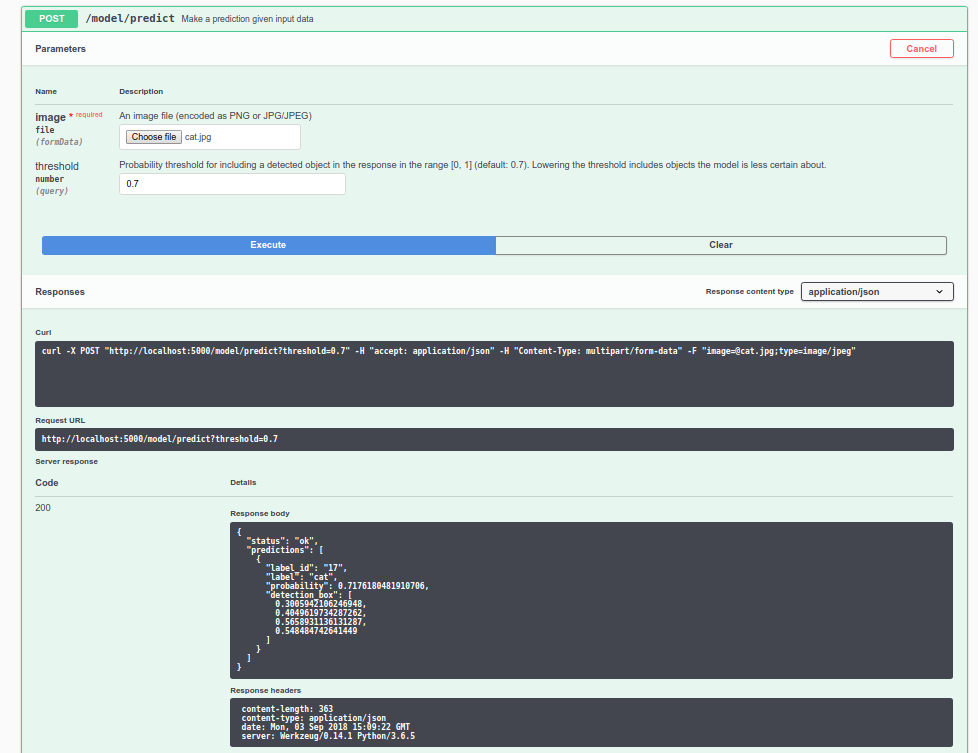
Prediction Cat
Since it has a swagger file, you can easily generate the clients for your custom app to use this prediction server. Go to Swagger Editor Online and upload the swagger.json of the prediction API. It’s available at http://localhost:5000/swagger.json. Download it and then open using online swagger editor. Then you can use generate client menu to generate client side code to start. In the screenshot below, you can see it.
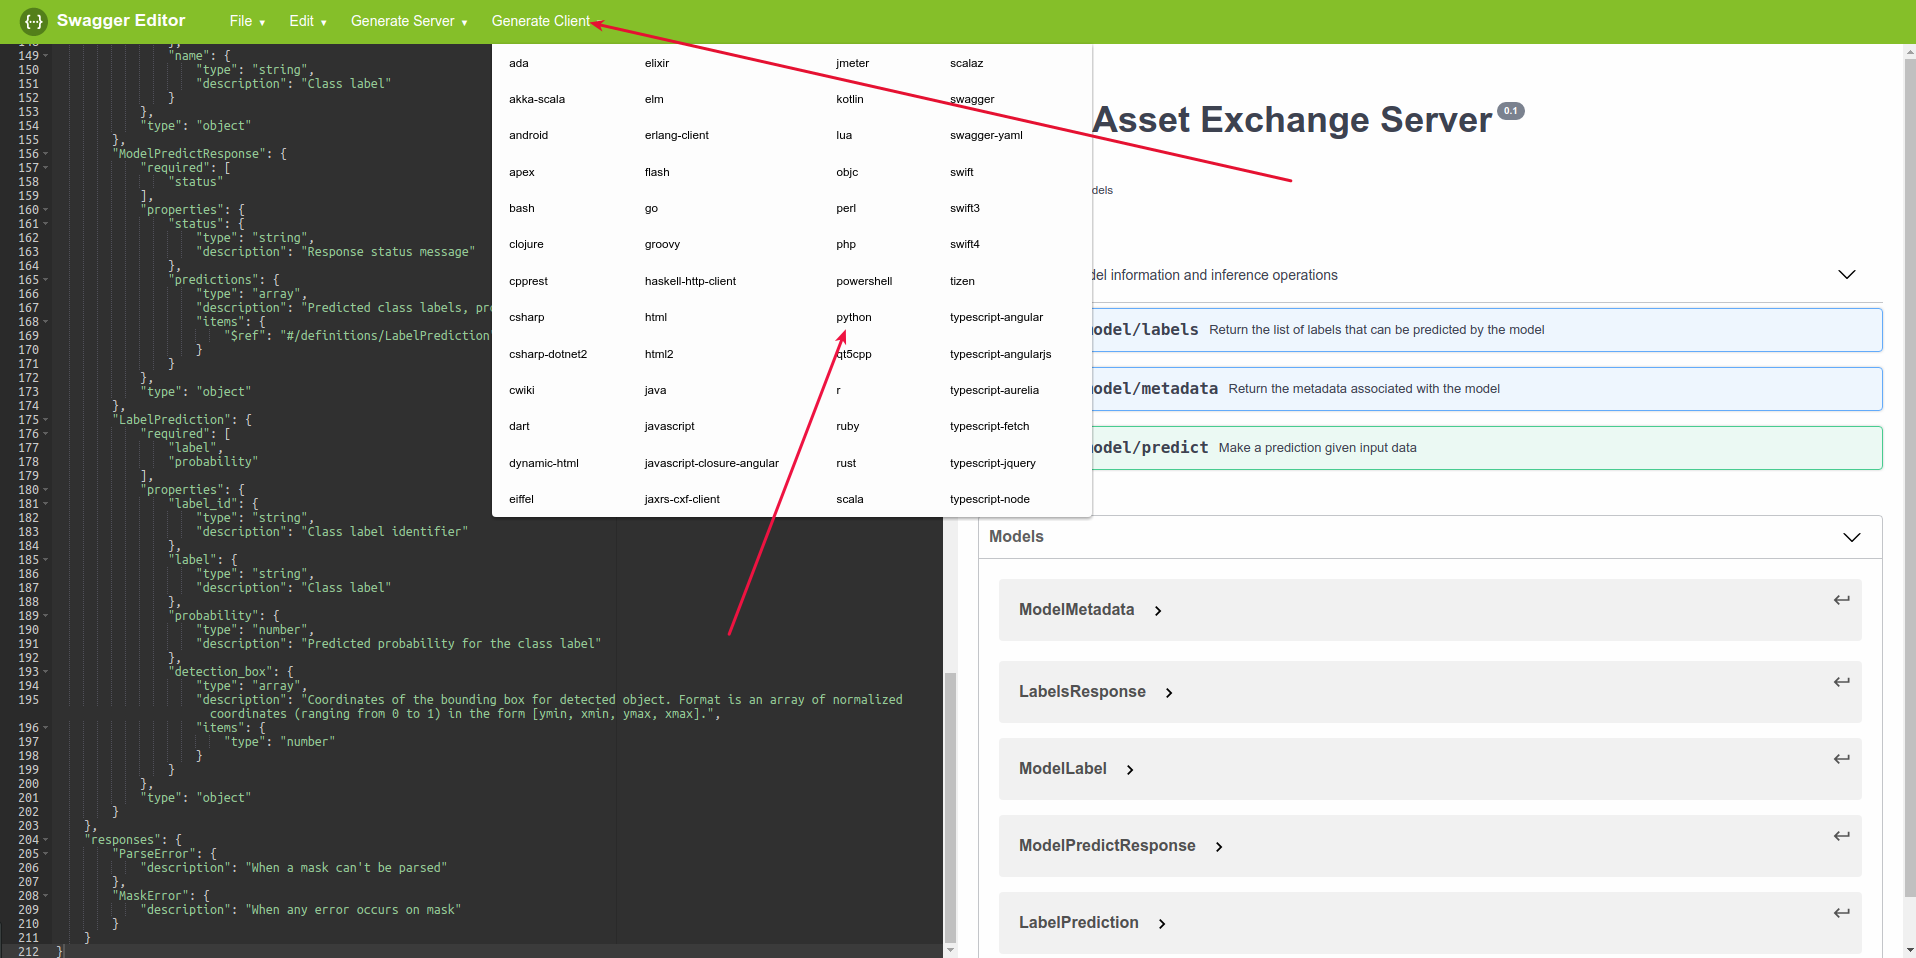
Using Swagger Editor Online for generating client code
You can generate the code for any available platform and then include it in your app. This makes integration straightforward. It works. But if you don’t like the extra cumbersomeness or ease of Swagger Client 4 then I would suggest using Requests python library. Either way the APIs are super easy to use. To use python Swagger Client. Extract the downloaded client code.
#install swagger_client code using
python setup.py install
Create an example.py to access the APIs. It should print the labels once you run this example.py
from __future__ import print_function
import time
import swagger_client
from swagger_client.rest import ApiException
from pprint import pprint

api_instance = swagger_client.ModelApi()

try:
    api_response = api_instance.get_labels()
    pprint(api_response)
except ApiException as e:
    print("Exception when calling ModelApi->get_labels: %s\n" % e)
In my case first it threw an error for https. Then I checked swagger_client/models/configuration.py and edited the host url
self.host = "http://localhost:5000"
Then ran again to get the list of labels.
(swagger_client) thej@uma:~/code/object_detector_python$ python example.py
{'count': 80,
 'labels': [{'id': '1', 'name': 'person'},
            {'id': '2', 'name': 'bicycle'},
            {'id': '3', 'name': 'car'},
            {'id': '4', 'name': 'motorcycle'},
            {'id': '5', 'name': 'airplane'},
            {'id': '6', 'name': 'bus'},
            {'id': '7', 'name': 'train'},
            {'id': '8', 'name': 'truck'},
            {'id': '9', 'name': 'boat'},
            {'id': '10', 'name': 'traffic light'},
            {'id': '11', 'name': 'fire hydrant'},
            {'id': '13', 'name': 'stop sign'},
            {'id': '14', 'name': 'parking meter'},
            {'id': '15', 'name': 'bench'},
            {'id': '16', 'name': 'bird'},
….
….
           {'id': '89', 'name': 'hair drier'},
           {'id': '90', 'name': 'toothbrush'}]}
Let me know if this tutorial helped you in kick-starting your ML learning. Also there are many more real code examples on IBM Data Science site. You can directly clone the GitHub projects and experiment with them.
- Assuming you already know Docker ↩
- 100MB + downloads ↩
- Built on COCO project. ↩
- In python the package will be swagger_client, its probably good idea to change it. ↩