How to Write your First Minetest Mod
I am a big fan of Minecraft. I remember buying it in 2011 from Mojang for 15 euros. It’s one of the few games I bought. It’s also one of those games I visit once in a while. My recent experiments with it has been using Minecraft pi and Minecraft API mostly around the concept of teaching programming using games. It’s free (as in beer)1 and comes with API to play. On a non-Pi installations you need setup plugins to get access. Also since the license is unclear, I am not sure if I can use it liberally like I would use a Free and Open Source Software. Hence the exploration began and I found Minetest.
Table of Contents
Minetest
Minetest is an open source voxel game engine. Play one of our many games, mod a game to your liking, make your own game, or play on a multiplayer server. Available for Windows, macOS, GNU/Linux, FreeBSD, OpenBSD, and Android.
Minetest – An open source voxel game engine.
Its FOSS, meant for moding and runs on all platforms. Everything I wanted. So quickly I started playing Minetest. It’s not bad. You will face an issue here and there 2 but on my Ubuntu it felt great. Next thing was to test how easy it is to mod 3 and introduce a new feature. I started by coding a new type of block. Here are the notes from that exercise.
Installation and Running
On Ubuntu installation is straight forward. It’s not difficult for other platforms too.
#install
sudo apt-get install minetest

#run by just calling
minetest
Minetest can host a server where you and your friends can share games and save work. But here we are going to play a local game in creative mode with no damages. You can create a world if there are no worlds. By clicking on New.
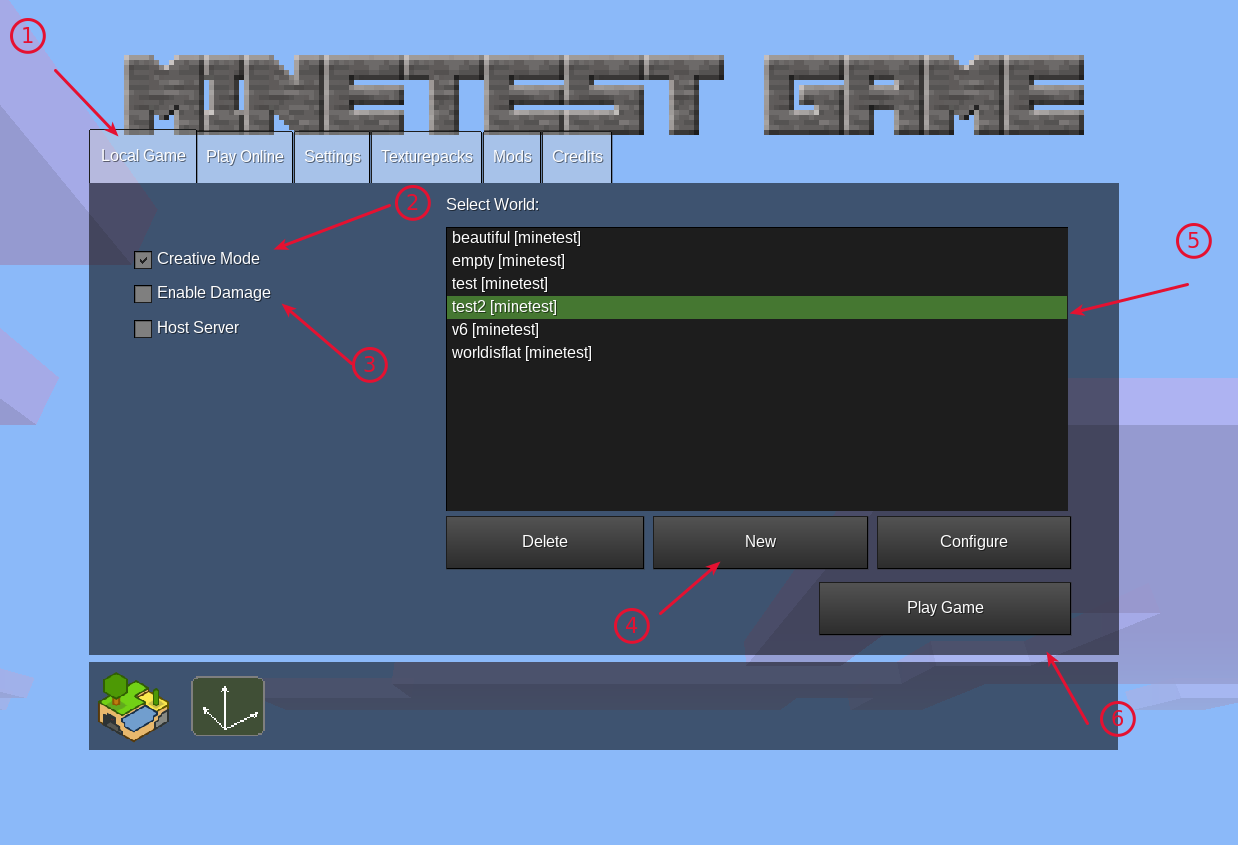
Create a world and start a local game.
Once you start. You can play like usual. At any point you can exit by pressing ESC key. You can restart by selecting the same world.
Mod structure
On Ubuntu, Minetest configurations are stored under users home folder – ~/.minetest. The mods are stored inside the mod folder i.e ~/.minetest/mods/ each mod will have its own folder under mods. Usually installing mod means copying the mod code to this folder. With expanded mods folder with two mods mod_1 and mod_2 this is how your ~/.minetest folder will look
├── worlds
│    mods/
│    ├── mod_1/
│    │   ├── depends.txt
│    │   ├── init.lua
│    │   ├── mod.conf
│    │   ├── functions.lua
│    │   ├── README.txt
│    │   ├── textures/
│    │   │   ├── top.png
│    │   │   └── ...
│    │   ├── sounds/
│    │   │   ├── sound files
│    │   │   └── ...
│    │   └── models/
│    │       ├── mod.x
│    │       └── ...
│    └── mod_2
│    │   ├── depends.txt
│    │   ├── init.lua
│    │   ├── mod.conf
│    │   ├── functions.lua
│    │   ├── README.txt
│    │   ├── textures/
│    │   │   ├── top.png
│    │   │   └── ...
│    │   ├── sounds/
│    │   │   ├── sound files
│    │   │   └── ...
│    │   └── models/
│    │       ├── mod.x
│    │       └── ...
│
├── client
│
├── minetest.conf
│
│
As you see mod_1 has couple of folders and files.
- init.lua – This is the only REQUIRED file. This will run as soon as the game loads.
- mod.conf – Not a must but it’s good to have. It will contain the configuration
- depends.txt – To be compatible with 0.4.x you need to mention other mods your mod depends on. It’s just a listing. For modern version he dependency is part of mod.conf
- functions.lua – Functions
- textures folder with images – If you want images as part of your game
- models folder with models
- sounds folder with sound – if you want sound files
Your first mode
Before you start writing your first mod, please do know all the mods are written in Lua Scripting language. It’s easy to learn and code. You can try this 15 mins tutorial if you are short on time. With that let’s start our first mod which is just an introduction of a new block type into the game.
We will create a new mod called ‘thej’, so start with creating a folder called ‘thej’ under mods folder, i.e ~/.minetest/mods/thej and then create a mod.conf file to define our mod. mod.conf is a simple key value configuration file. Add name, description and depends. Our module is dependent only on ‘default’ mod. The contents of mod.conf will look like this
name = thej
descriptions = Thej own mod add a new brink called squares
depends = default
Next we need define our block. For this we will create init.lua and define our block there.
print("Welcome Thej - from the mod")
minetest.register_node("thej:squares", {
    description = "Thej sqaures brick",
    tiles = {
        "minetest_block.png",
        "minetest_block.png",
        "minetest_block.png",
        "minetest_block.png",
        "minetest_block.png",
        "minetest_block.png"
    },
})
Here as you can see we are defining an item 4 for the mod thej and name of it is squares. Then we are defining images for the tiles. That’s it, the block is ready to be used.

Block
$:~/.minetest/mods/thej$ tree
.
├── init.lua
├── mod.conf
└── textures
    └── minetest_block.png
-- order of tiles while defining node in case you want the block to look different each side.
"up.png",
"down.png",
"right.png",
"left.png",
"back.png",
"front.png"
At this point our mod is ready to be used. Of course you can do a lot more. But this is an intro how-to.
Include and use your mod
Since your mod is already under ~/.minetest/mods you don’t have to do anything else to be loaded. So start the minteset and then enable the mode for specific world you are going to play.
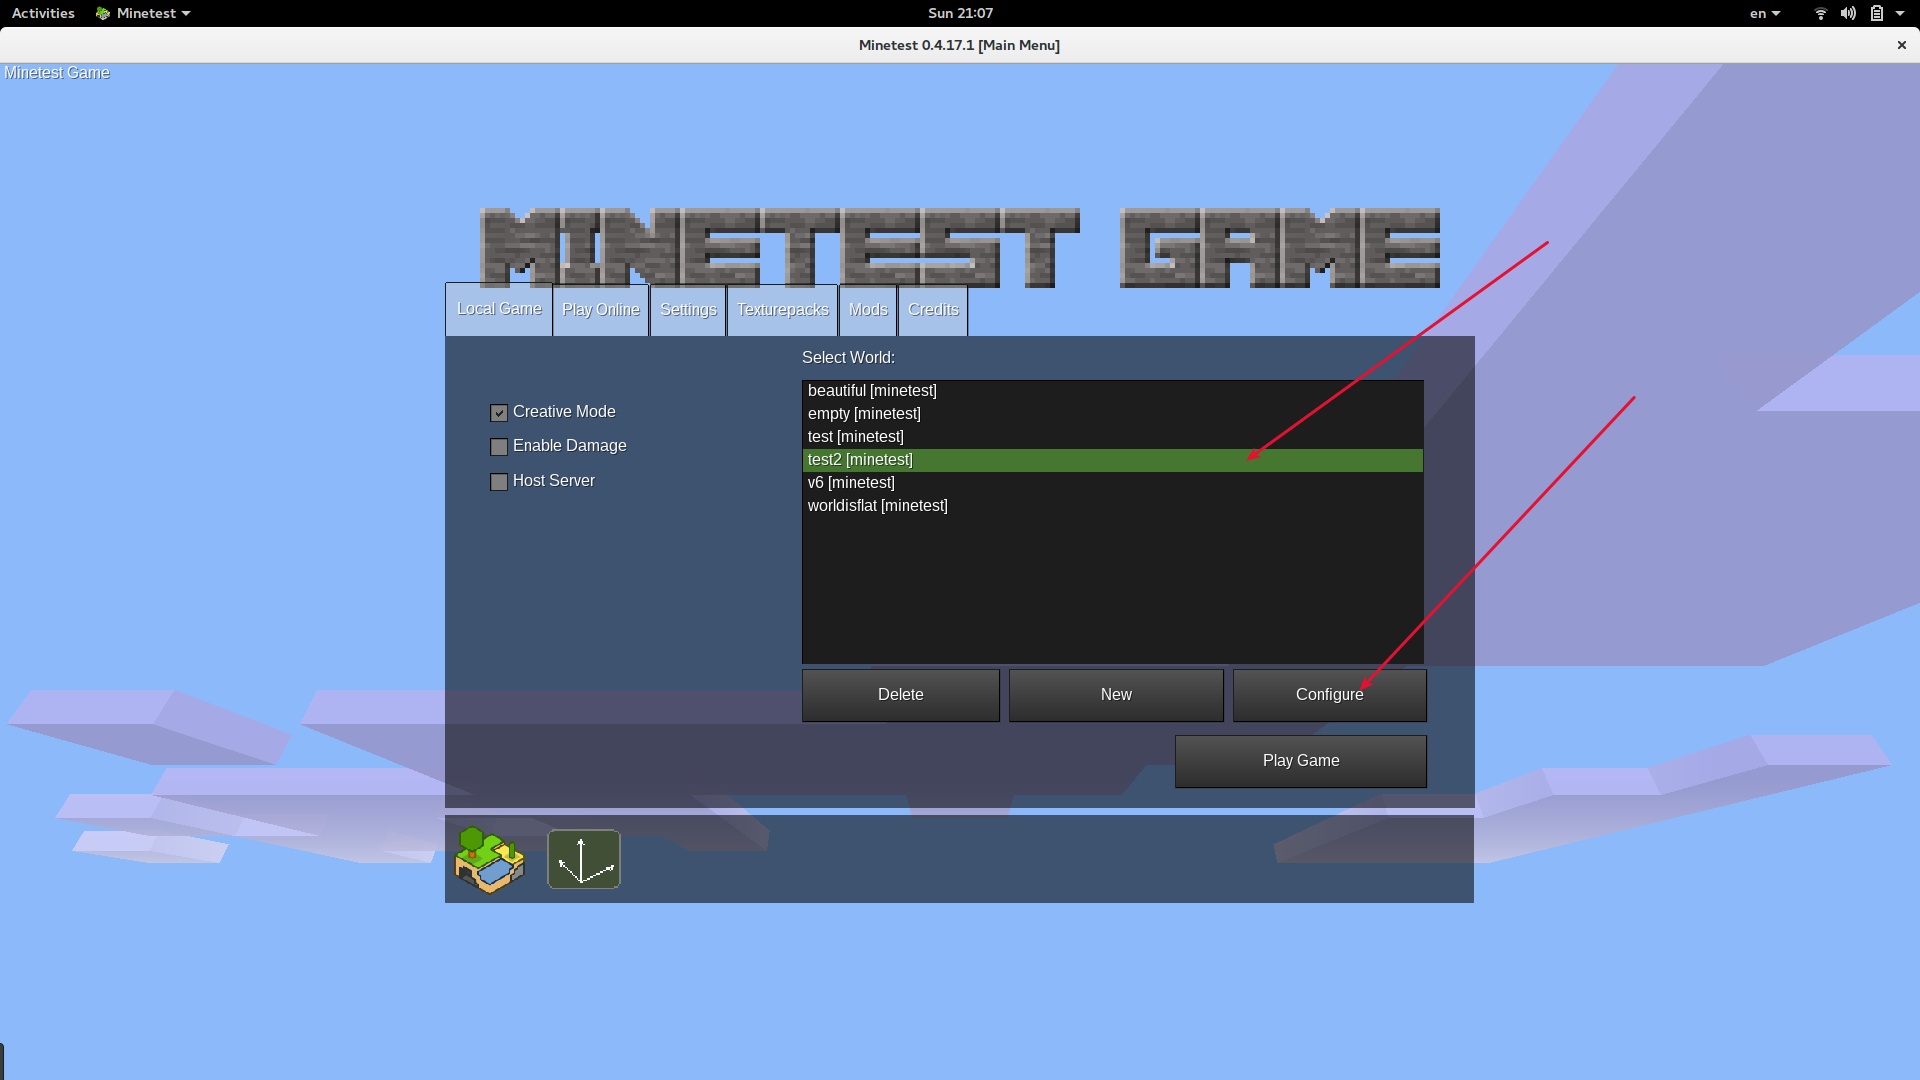
Select the world and click configure.
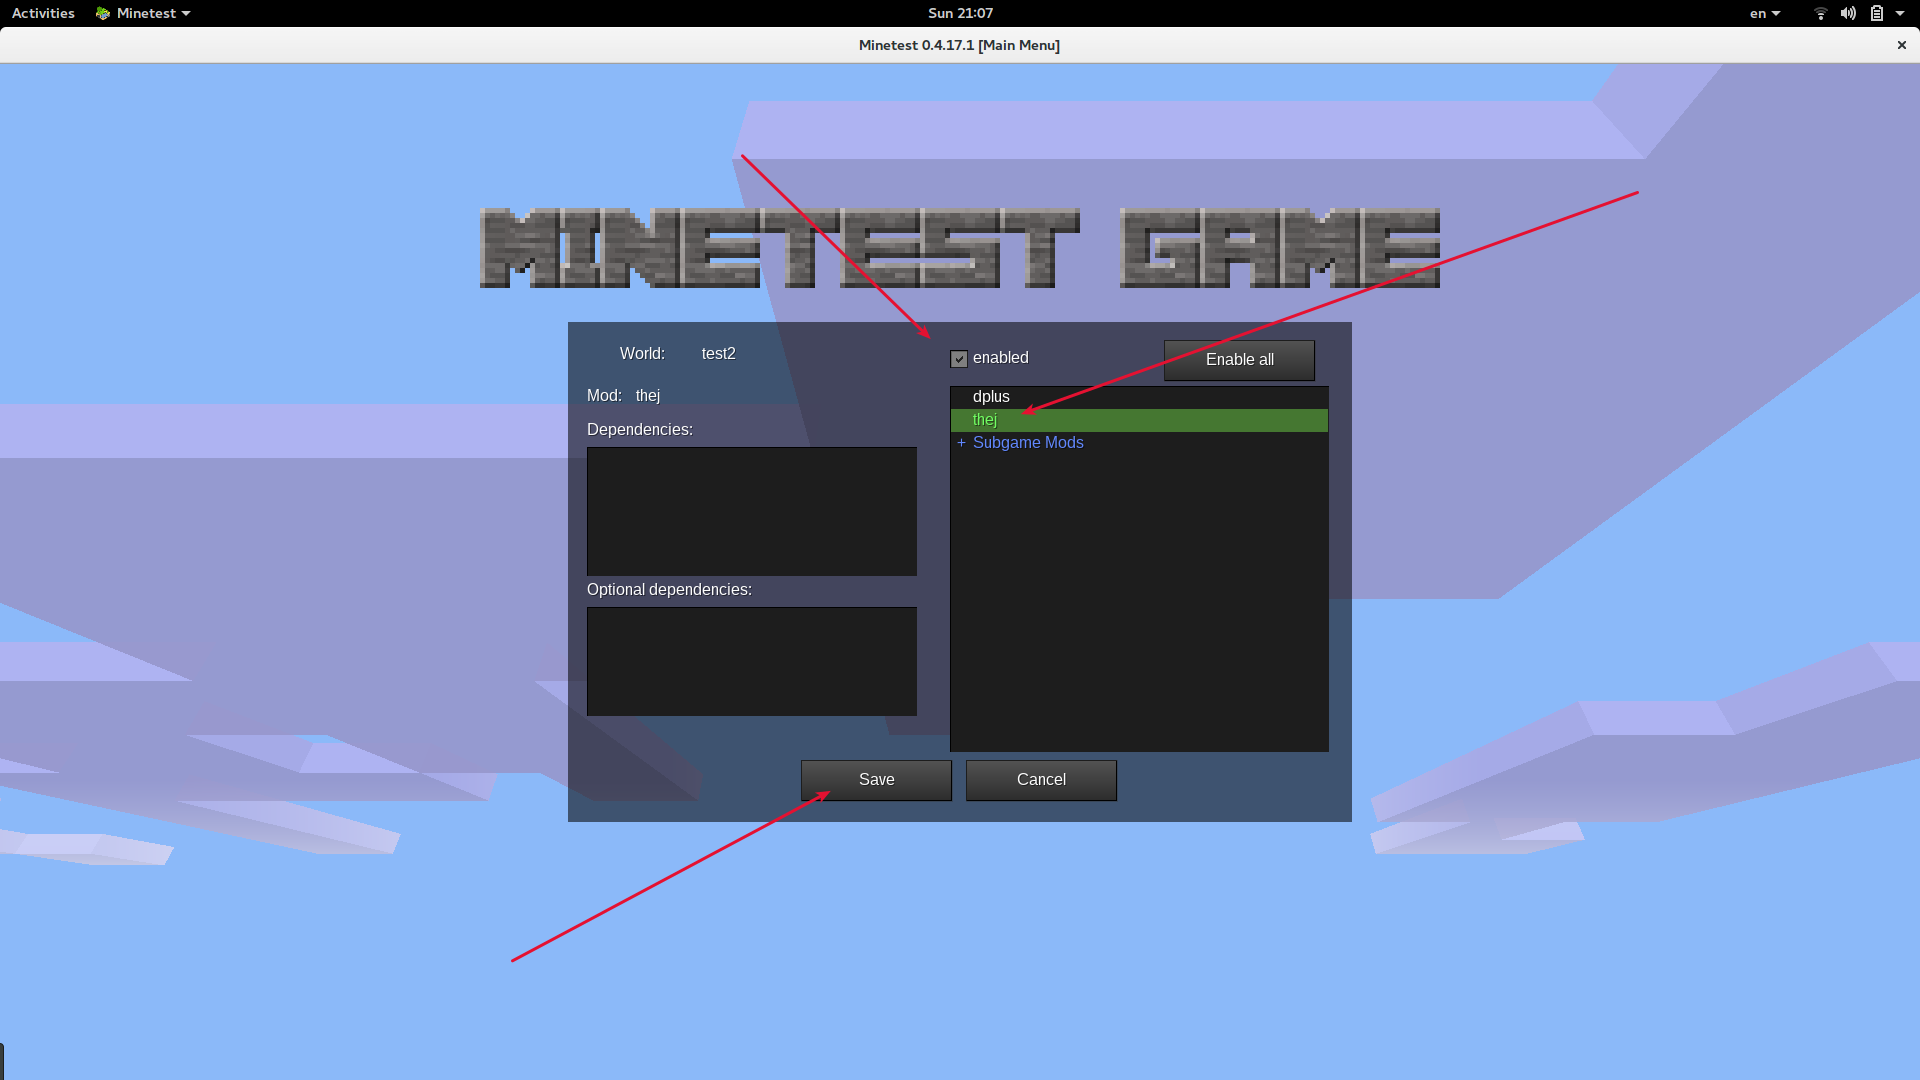
Enable our mod – thej

Go to inventory search for our block and add it
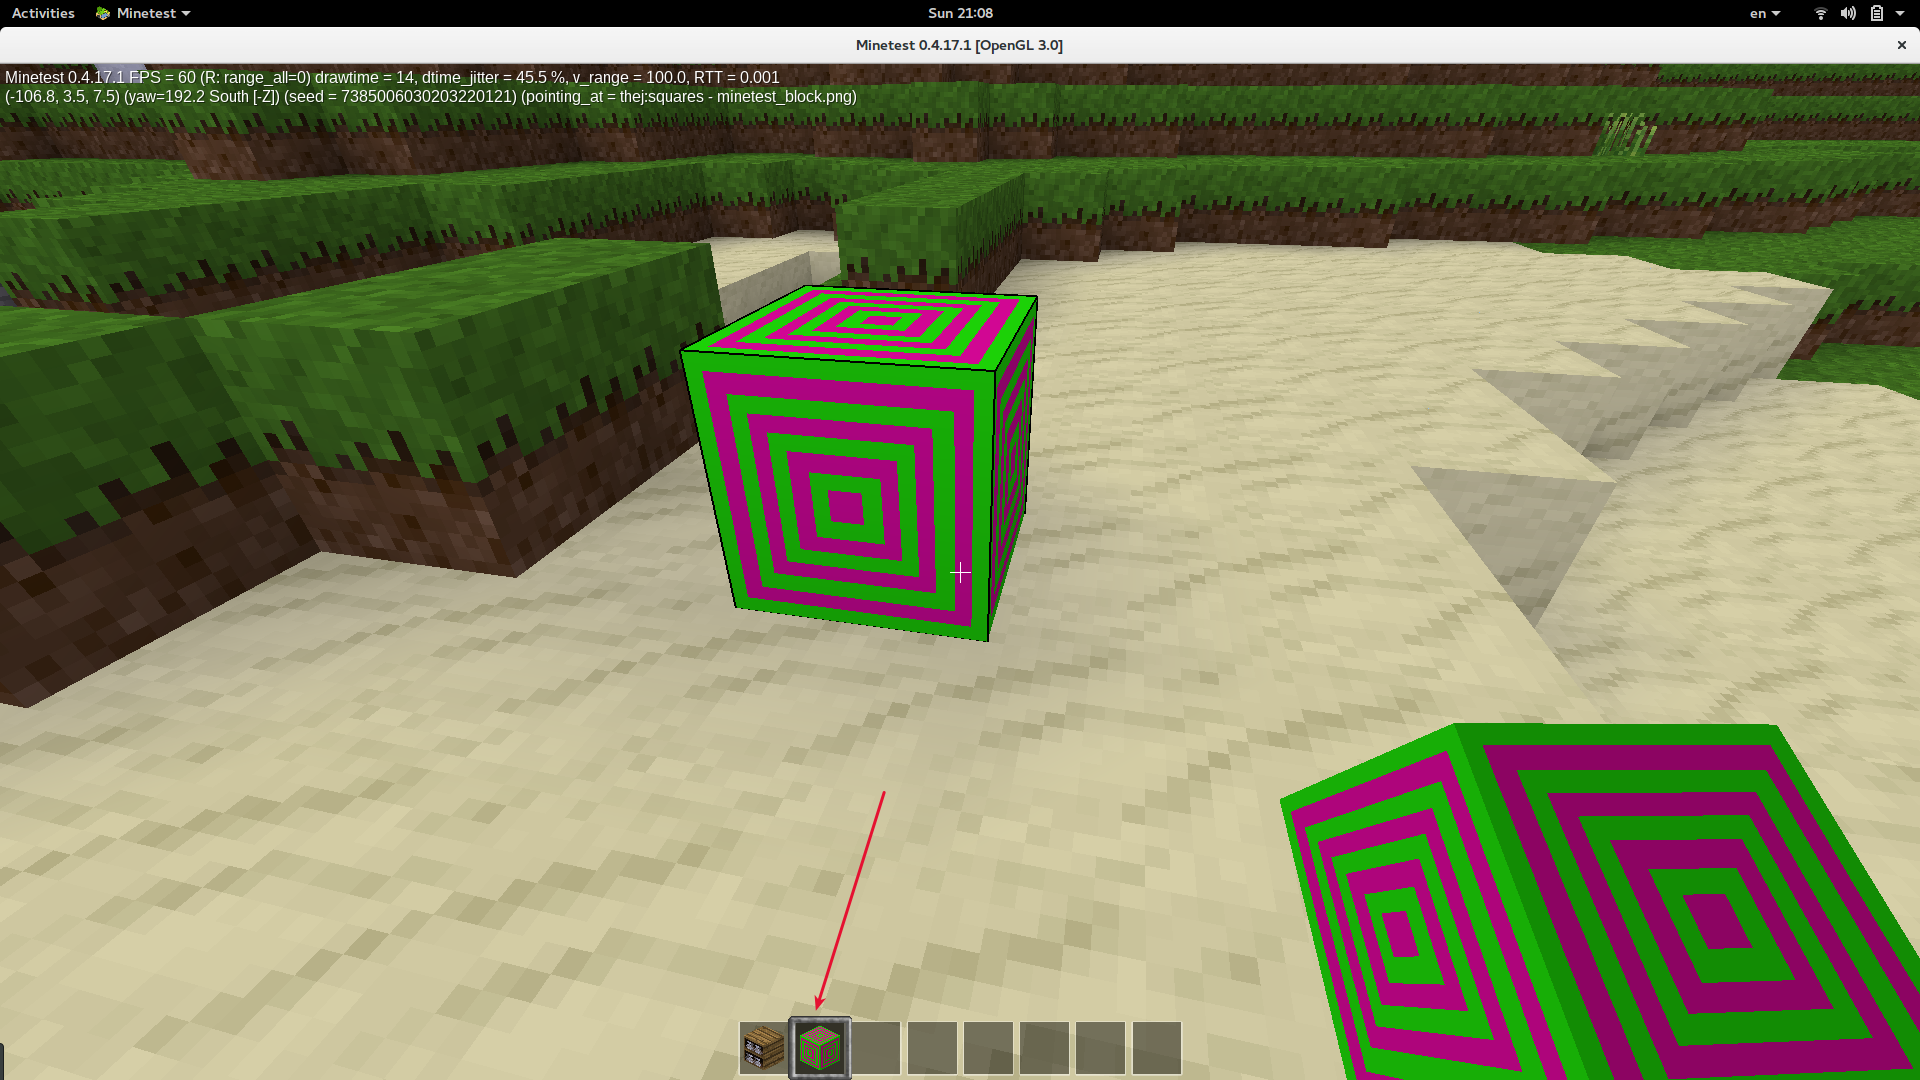
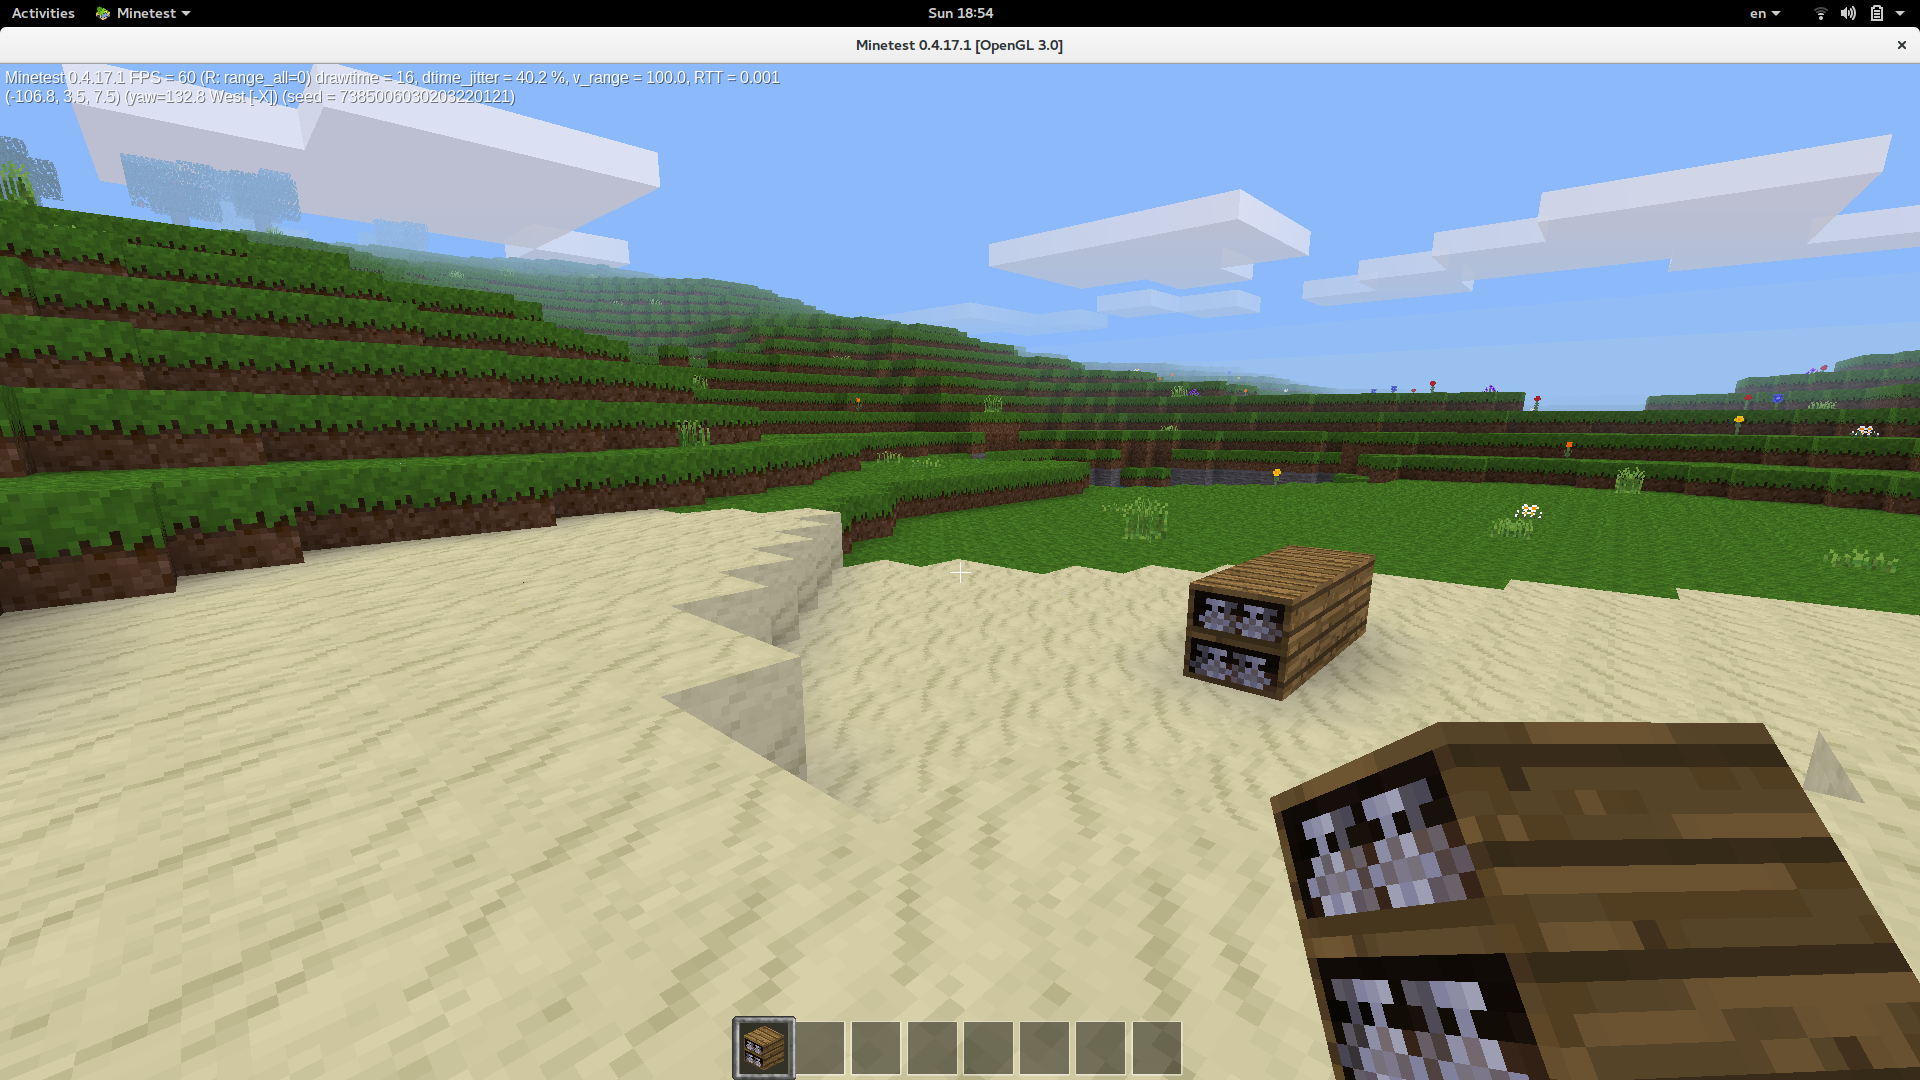
Start using your block and build something awesome

Hi from Minetest