Getting started with SystemML
I have been exploring data as part of work and hobby for a long time. My process mostly involves clean up, analyze and visualize. Something that has always interested me but never gotten around to experiment was recommendations. I have done some rudimentary recommendations but never deep dive into it. Never explored machine learning to enhance it. But in last few months it has changed. I have explored few algorithms, frameworks. Once I got comfortable with that part, my immediate next challenge was deployment. How would I deploy such a system? Since my main programming language was Python, the system needs to accommodate it. Also I wanted a setup that could be deployed for a medium scale system to a reasonably huge system.
Table of Contents
Welcome to SystemML
SystemML was created in 2010 by researchers at the IBM Almaden Research Center, it’s a high-level declarative machine learning language which comes in two flavors R-lang syntax type and Python syntax type. It was designed to make machine learning algorithms written in R-lang or Python to scale using distributed computing. Without SystemML programmers will have to rewrite the algorithms in Scala or Java to scale, which is such a waste of time. Given my preferred programming language is Python. SystemML is a blessing in disguise.
Now one can write the machine learning algorithm in DML (R-lang flavor) or PyDML (Python flavor) . DML/PyDML scripts can be run on Spark, on Hadoop, or in Standalone mode. Here we will experiment first in standalone mode and next Spark.
SystemML also exposes a MLContext API using which SystemML can be accessed from a Jupyter Notebook via Python. So if you or your team is used to notebooks then no problem, you can use the same code experimented at scale. This is my favorite way to experiment as well. We will try to explore this too.
Install SystemML and Run Hello World
Install standalone SystemML by using one of the available binaries. Once installed you will have access to runStandaloneSystemML.sh or runStandaloneSystemML.bat that can be used run PyDML scripts. Le’s start with running the hello world program given on this page by passing the script name and arguments to the runStandaloneSystemML.sh. For the sake of ease I have republished the code here
print('hello ' + $1)
Run it using command line using standalone SystemML
./runStandaloneSystemML.sh hello.pydml -args world
Run advanced program using Spark
SystemML was created to run on platforms meant to scale. Algorithms written in SysteMML be run on Hadoop, on Spark without change. I really like Apache Spark.
Apache Spark originally developed at the UC, Berkeley’s AMPLab, is a cluster computing API. In simple words Spark has a main program which executes certain operations in parallel on cluster. The center of the setup is resilient distributed dataset (RDD), its a fault tolerant collection of elements that can be operated on in parallel. This RDD is what makes data available cluster. SystemML scales on Apache spark like a dream. SystemML also has Machine Learning API’s. The examples below is in PyDML
#If you don't have java installed then install java
sudo apt-get install default-jdk

#Install Scala then
sudo apt-get install scala

#Download spark pre-built for Hadoop 2.7 version of Spark
#in my case file name was  spark-2.2.0-bin-hadoop2.7.tgz

#Extract the tgz
tar xvf spark-2.2.0-bin-hadoop2.7.tgz


#Set env variables in .bashrc and restart the shell
#assuming you have extracted the spark in your home folder
nano .bashrc

#add the following at the end of the .bashrc
export SPARK_HOME=~/spark-2.2.0-bin-hadoop2.7
export PATH=$SPARK_HOME/bin:$PATH
export PYTHONPATH=$SPARK_HOME/python/:$PYTHONPATH
export PYTHONPATH=$SPARK_HOME/python/lib/py4j-0.10.4-src.zip:$PYTHONPATH

#reload .bashrc
source ~/.bashrc


#Run locally, inside bin
spark-shell
#the above command will open the spark shell prompt, like below. Where you can
#enter the scala code
#
#Welcome to
#      ____              __
#     / __/__  ___ _____/ /__
#    _\ \/ _ \/ _ `/ __/  '_/
#   /___/ .__/\_,_/_/ /_/\_\   version 2.2.0
#      /_/
#
#Using Scala version 2.11.8 (OpenJDK 64-Bit Server VM, Java 1.8.0_76-release)
#Type in expressions to have them evaluated.
#Type :help for more information.
#
#scala>
#
#you can also start python interface to Spark by running
pyspark


#Python 2.7.12 (default, Nov 19 2016, 06:48:10)
#Welcome to
#      ____              __
#     / __/__  ___ _____/ /__
#    _\ \/ _ \/ _ `/ __/  '_/
#   /__ / .__/\_,_/_/ /_/\_\   version 2.2.0
#      /_/
#
#Using Python version 2.7.12 (default, Nov 19 2016 06:48:10)
#SparkSession available as 'spark'.

You can try the following Hello world on pyspark prompt
>>> print "Hello World"
Hello World
Connect to Jupyter Notebook
Apache Spark can be used through python API called pySpark. It’s the way most Pythonistats use Spark. Another great tool used by data scientsts is Jupyter notebooks. PySpark integrates very well with Jupyter notebooks. That means you can code into SystemML (pyDML) in jupyter notebook and scale using the Apache Spark. That brings everything we dream together right?
Install Jupyter and SystemML
pip install jupyter
!pip install SystemML
We have already installed Spark and set the environments already. Then configure pyspark to use Juypter Notebooks
export PYSPARK_DRIVER_PYTHON=jupyter
export PYSPARK_DRIVER_PYTHON_OPTS='notebook'
Setup local hadoop common library. Download hadoop library.. Extract and set the HADOOP_HOME
HADOOP_HOME=~/software/hadoop-2.8.1
Restart the pyspark which should start the Juypter Notebook in the browser so you can use it.
pyspark
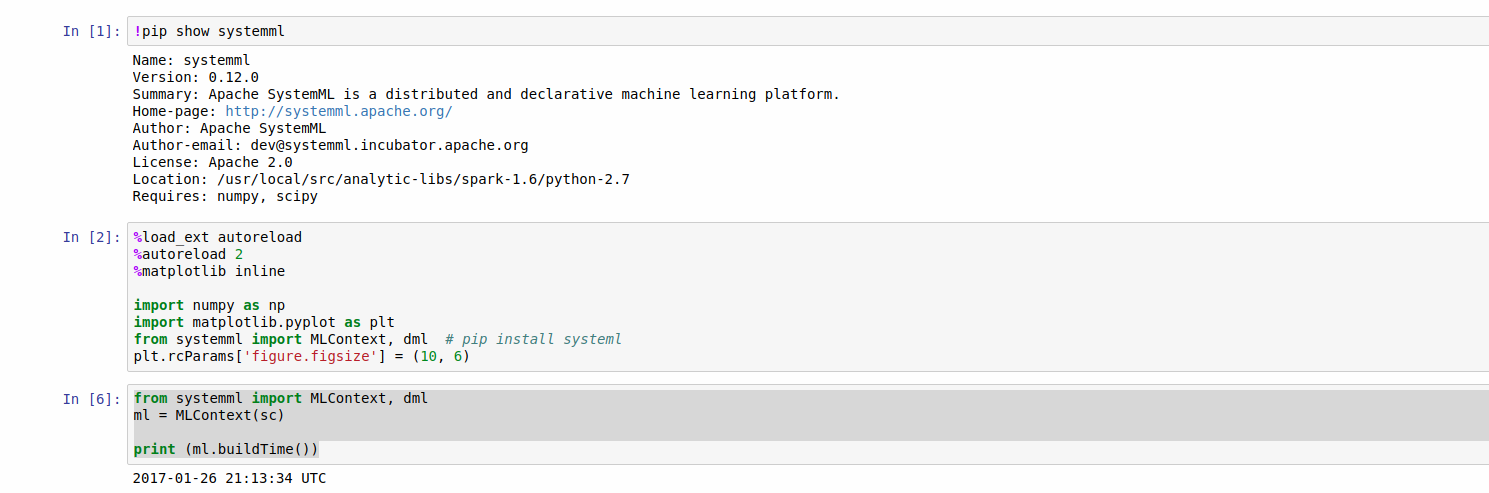
Once all these individual pieces are working. You can get the spark context to use from SystemML inside Jupyter
	import systemml
	from systemml import MLContext, dml
	ml = MLContext(sc)
	print (ml.buildTime())
	#it will print something like 2017-01-26 21:13:34 UTC
Running SystemML on Jupyter.
Now create your algorithm in SystemML (pyDML) on Jupyter Notebooks. Run it on Spark when you are ready. You can run the one like this locally.
Run ML using Notebook on Bluemix
Jupyter Notebook is my way of using SystemML+Spark on local computer. But if you are a data scientist and want to get productive instantly then best way would be to use IBM Data Science Experience. Once you create the account, open the default project (if there is no default project create one) and then create a notebook.
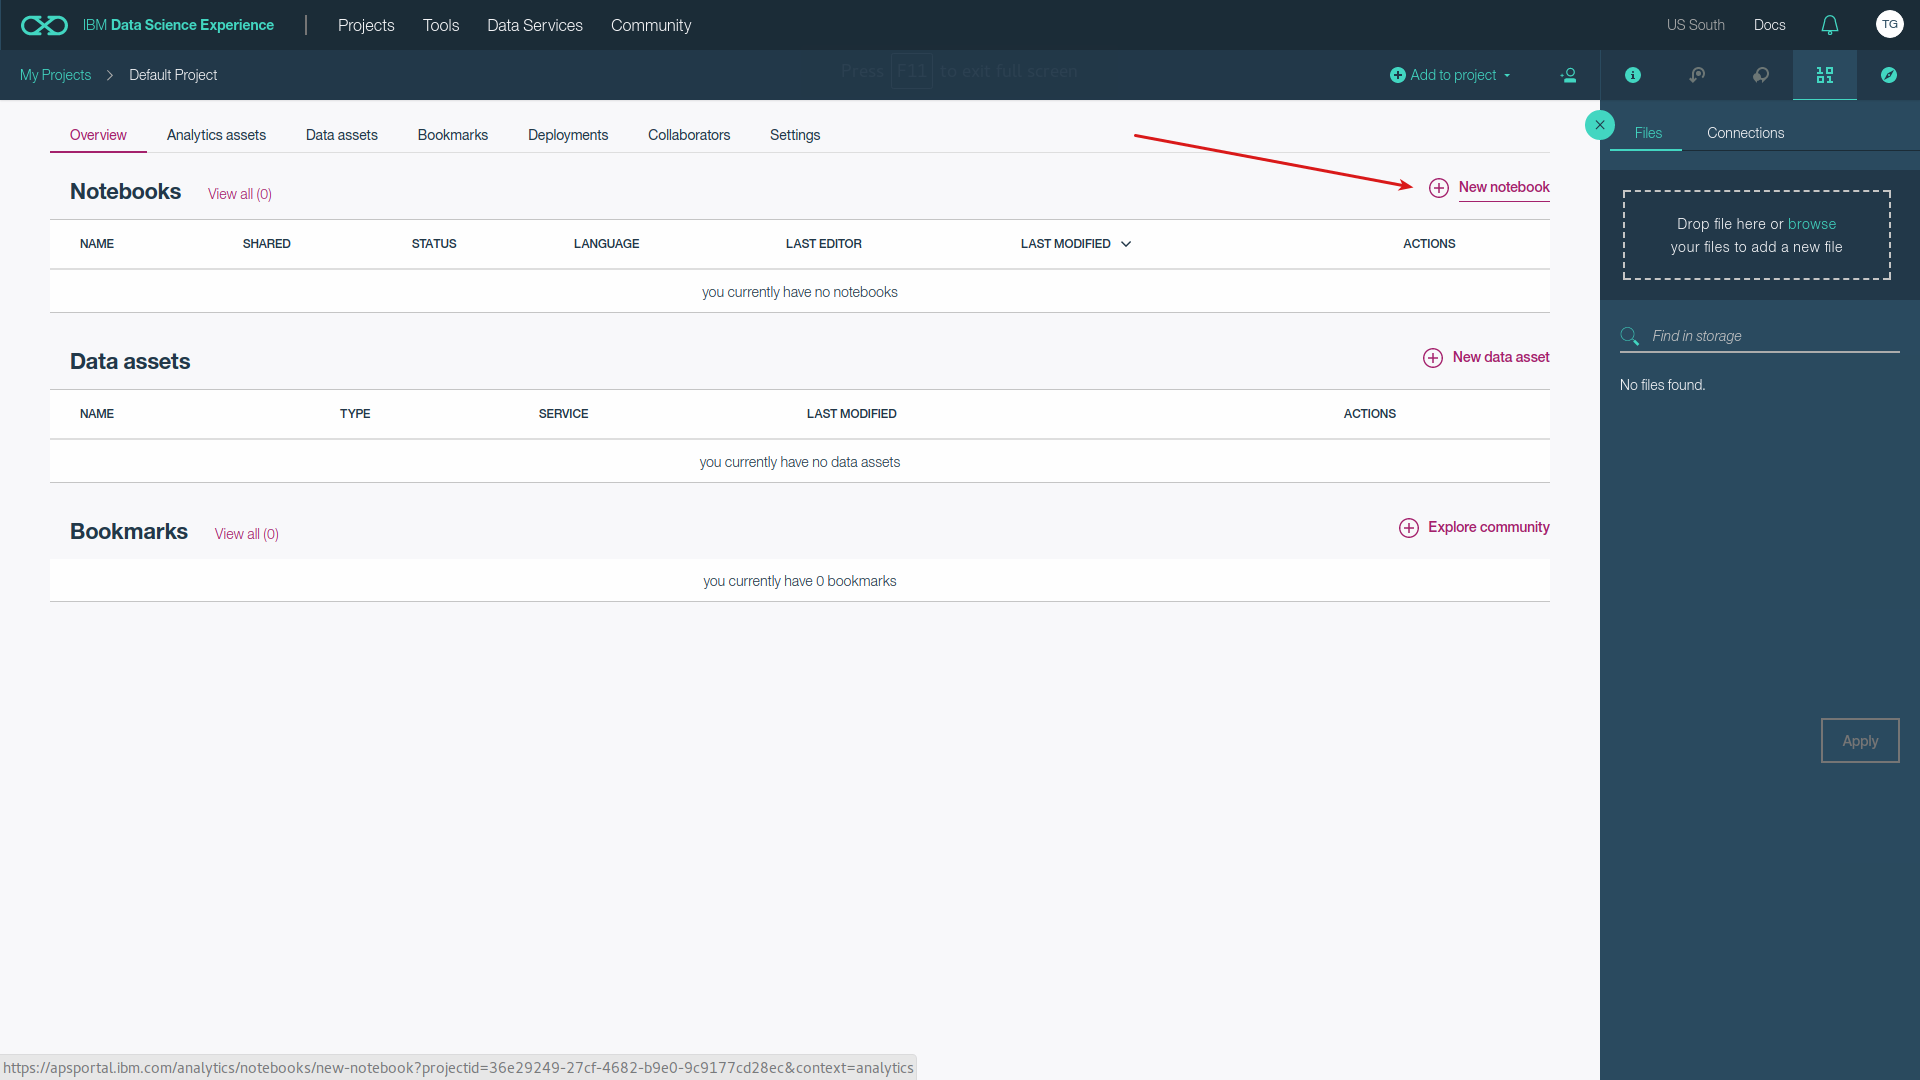
Create a new Jupyter Notebook.
While you are creating the project select Python and Instance of Spark. You can create a free lite instance of Spark on IBM Bluemix. Once you click on the create, the notebook gets created and gets linked to Spark.
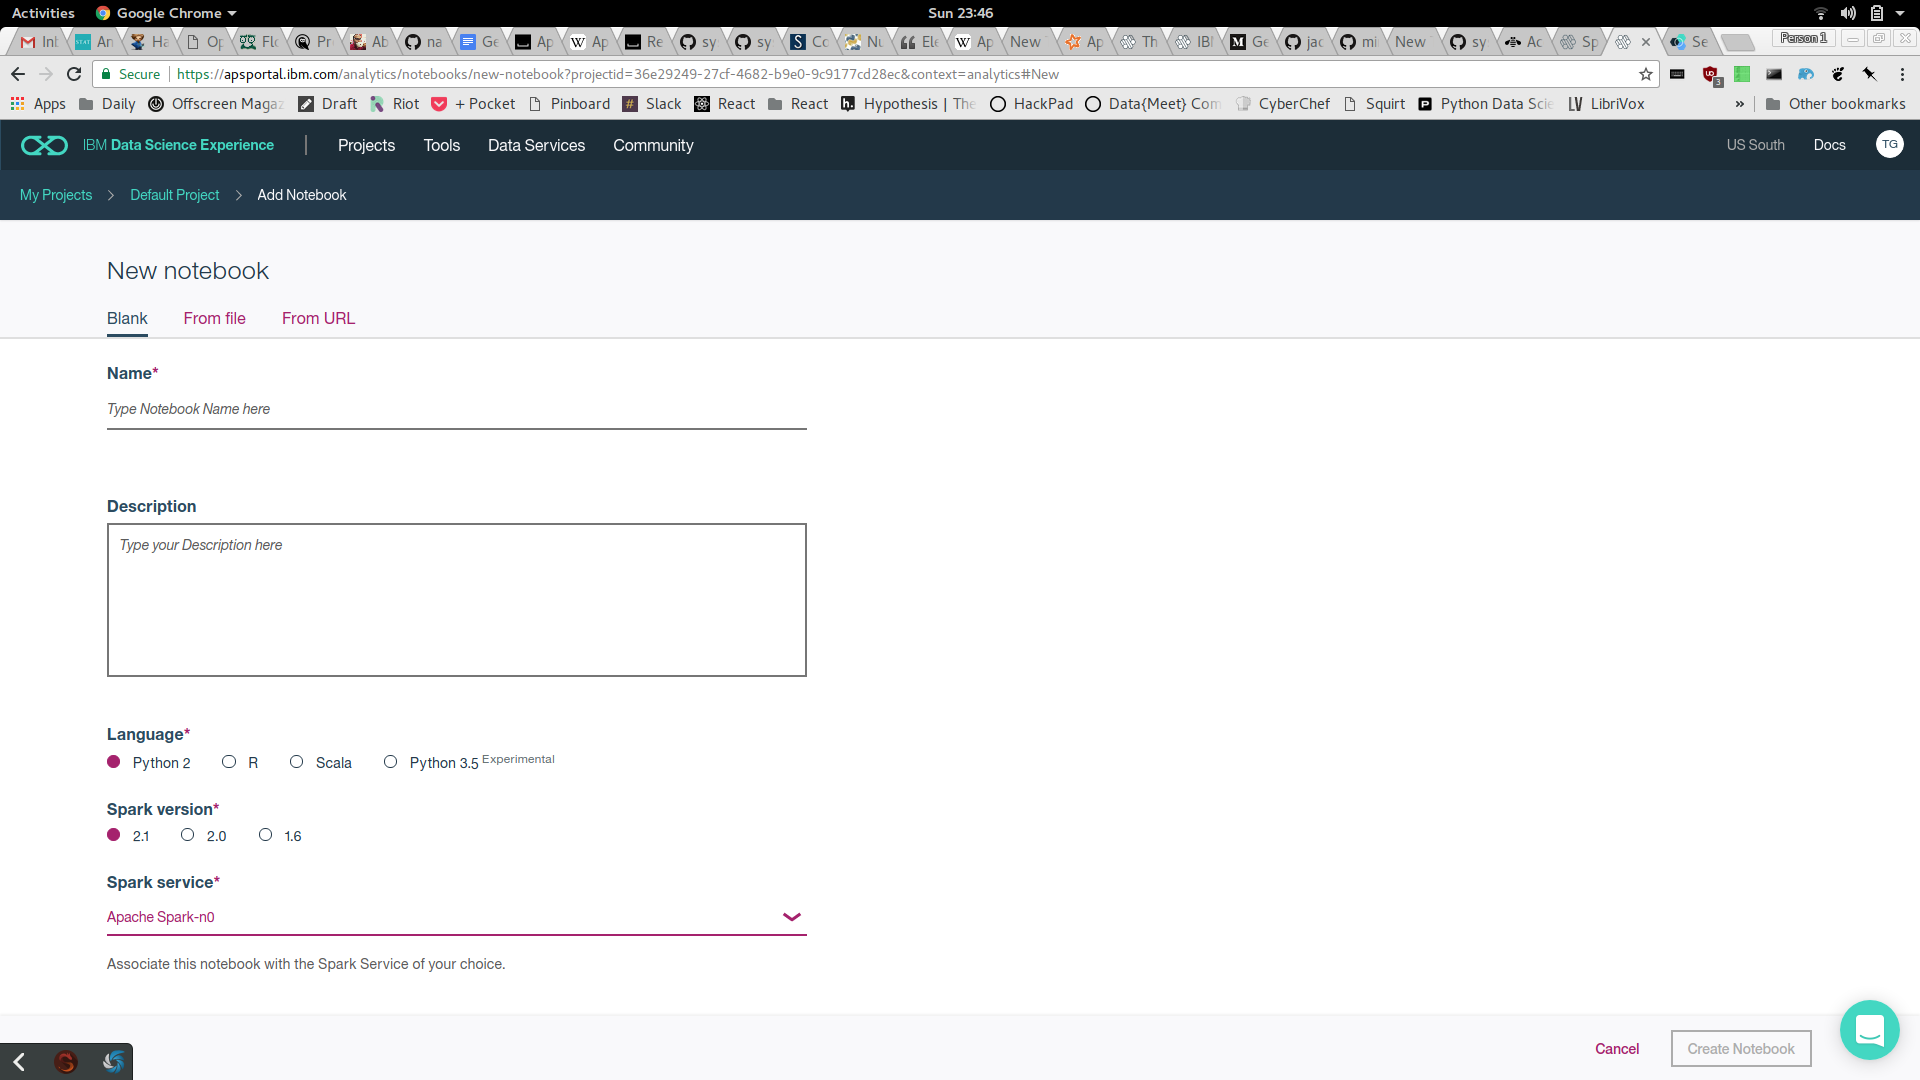
Select an instance of Spark to be associated with this NoteBook.
The you can start using SystemML by importing the SystemML package.
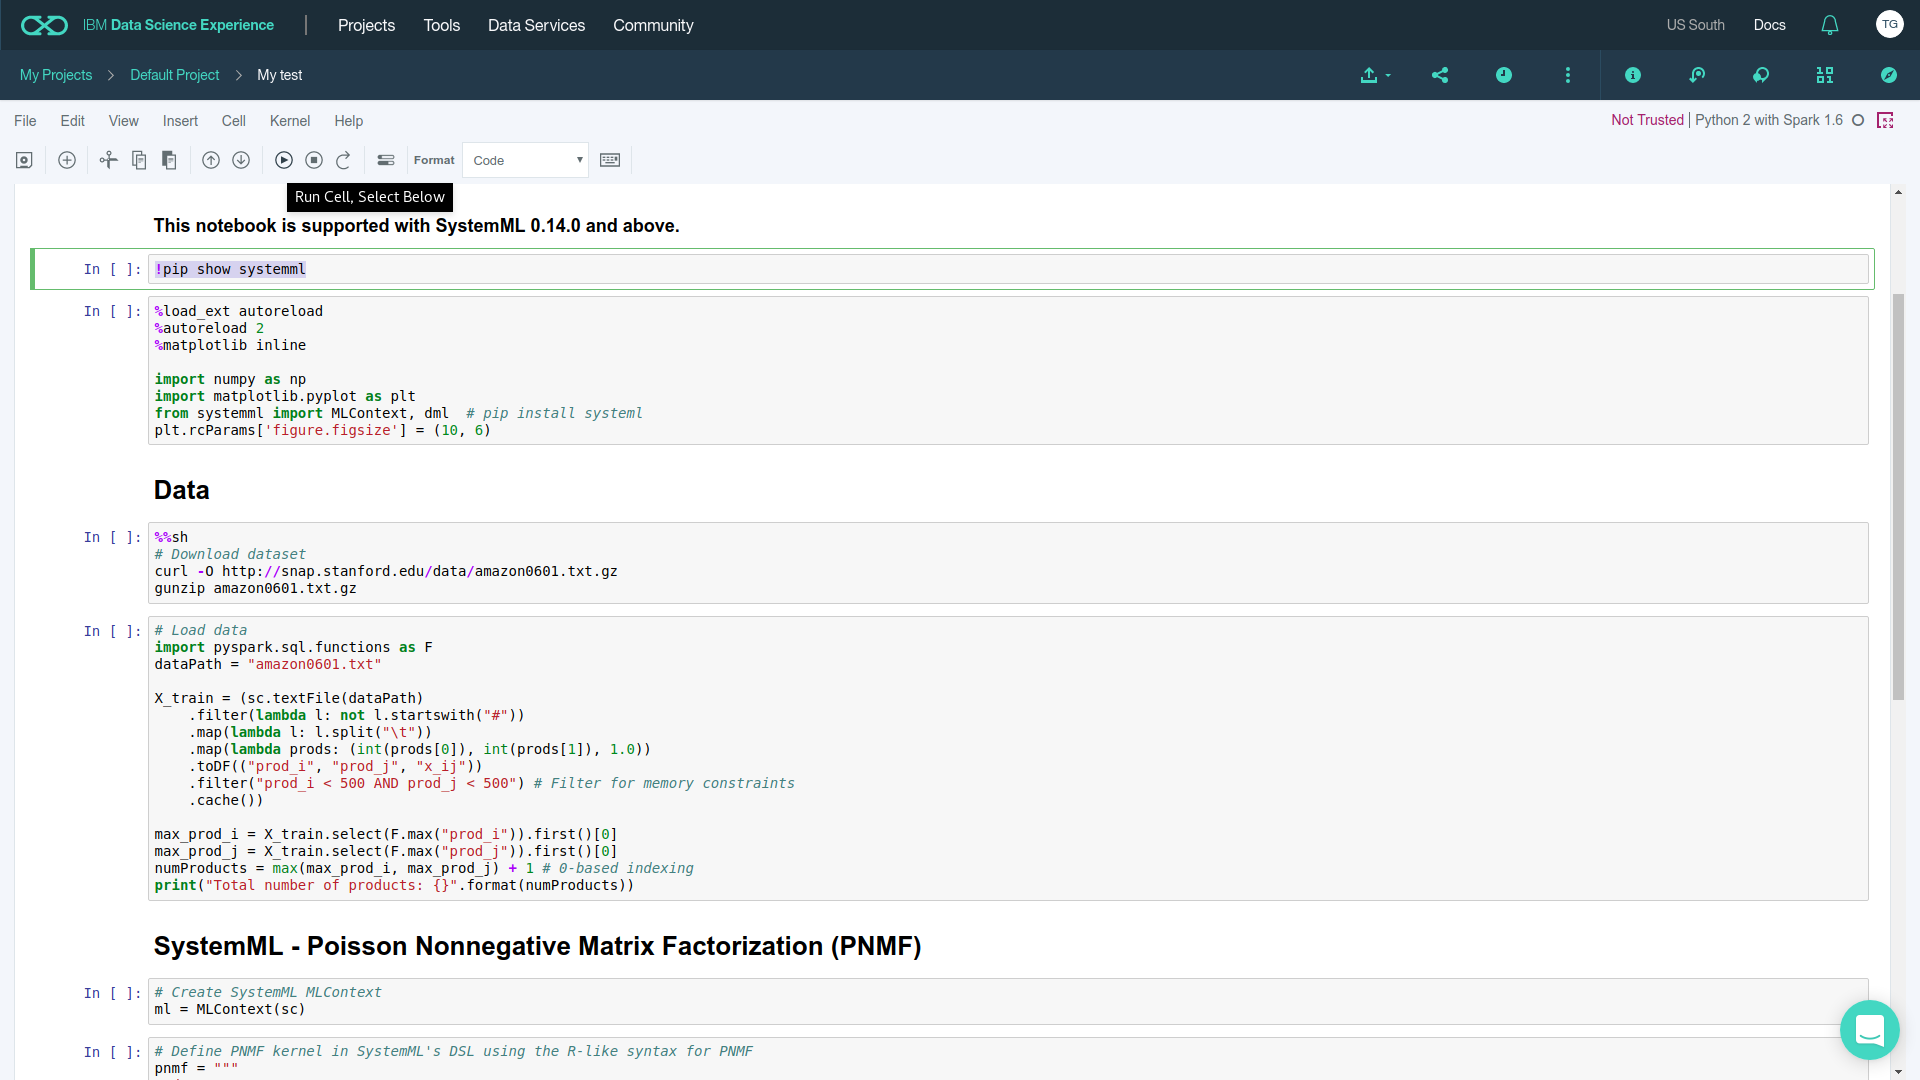
Run your SystemML
Now you are running code written in SystemML using Jupyter Notebook on Apache Spark. Once your algorithm is complete, you can schedule the notebook as a job. What could be easier than this?