Wireless Monitor Setups
One of the pain points of using multiple monitors on the go is wires. I want to go fully wireless at some point, but for now, I use wireless occasionally, especially when traveling.
Table of Contents
Hardware
Currently, the wireless display setup needs an HDMI port on your main device, power, and a local network. I use my travel router or phone with a hotspot for my network. At home, you can use your regular LAN for this.
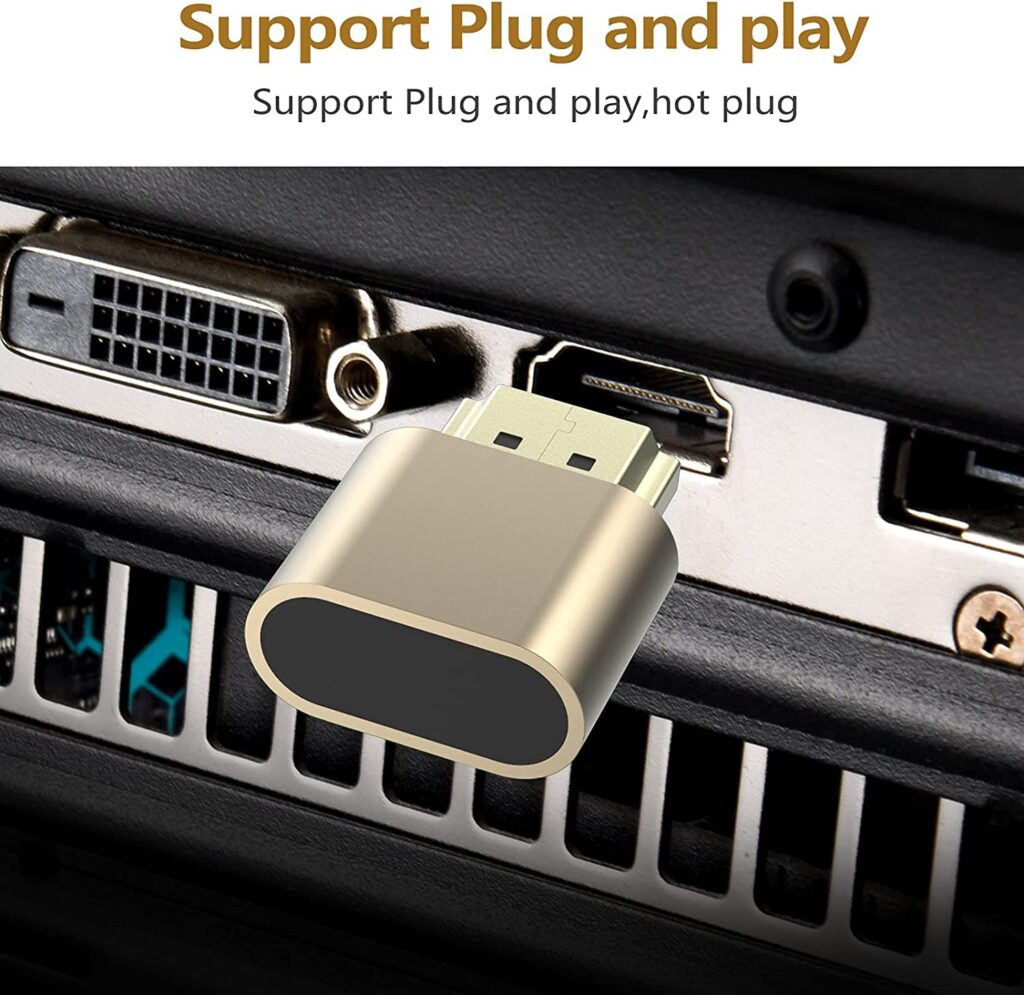
You will also need a Virtual HDMI Display Adapter or Dummy Display Adapter. It's an adapter that goes into your computer's HDMI port and simulates or emulates a display. Once you plugin this, your computer will show a second monitor in the display settings. You can configure this second display just like a real display. It looks like this and costs around Rs.200.

Miracast or Chromecast
This method needs an additional device like Chromecast or Miracast receiver if your display lacks built-in support. Usually, all smart TVs come with a Chromecast. If your display is simple like mine, then get a MiraScreen (Miracast receiver) or a Chromecast. Set it up to work with the network you are going to use.
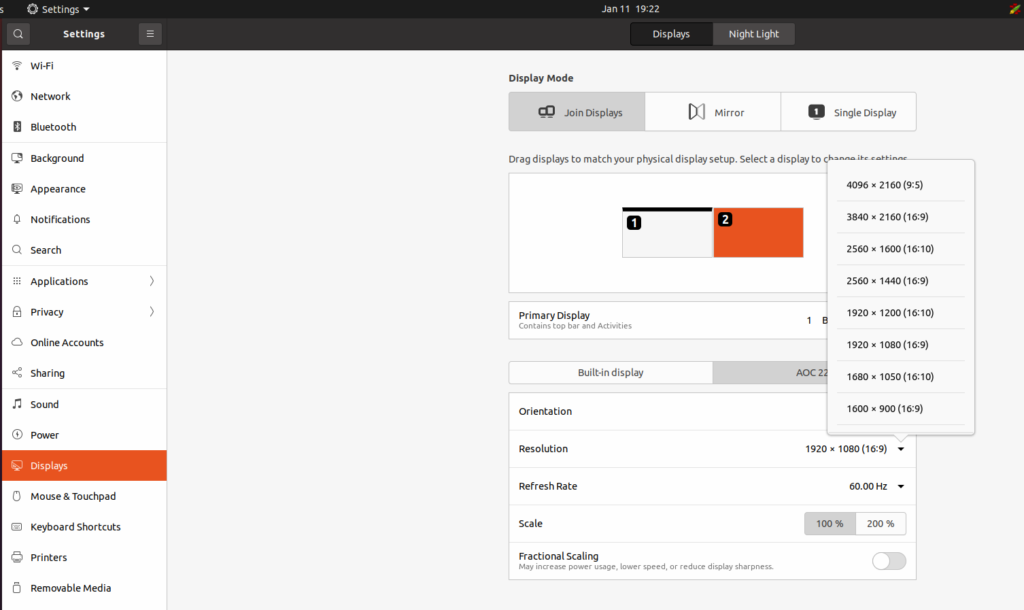
Then, plug the Virtual Display Adapter into your computer. Go to display settings in your computer ( Gnome - settings - Displays) and set it up the way you want. I usually use
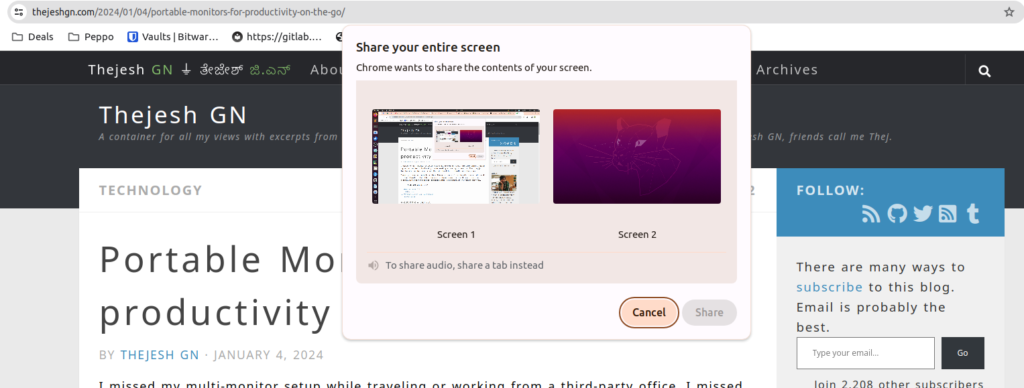
Then, open Chrome and cast the screen ( choose the second monitor) to the display. This will work like a second monitor based on the network speed. You can use the same keyboard, mouse, etc.
I see lag sometimes, but I usually don't play games or videos on my second screen. It's generally scrolling through and reading the document or code. This setup works well for that.
If you have the latest Gnome running on your computer, you can install Gnome Network Display; it can cast your desktop to a Miracast receiver device like MiraScreen or Miracast-supported TV/Display. This is the ideal setup and also avoids using Chrome.
Deskreen
If you don't have a Chromecast or a Miracast device, but if you have a second device on the network that has a browser, say a TV with a browser or a mobile phone or a display with a Pi running browser. Then, you can use this method.
Install Deskreen application. Open the application and stream the screen. This application takes the screen ( or a tab or an application) and streams it over the network by starting a local server. Using a Virtual Display Adapter, you can specifically stream the second virtual monitor.
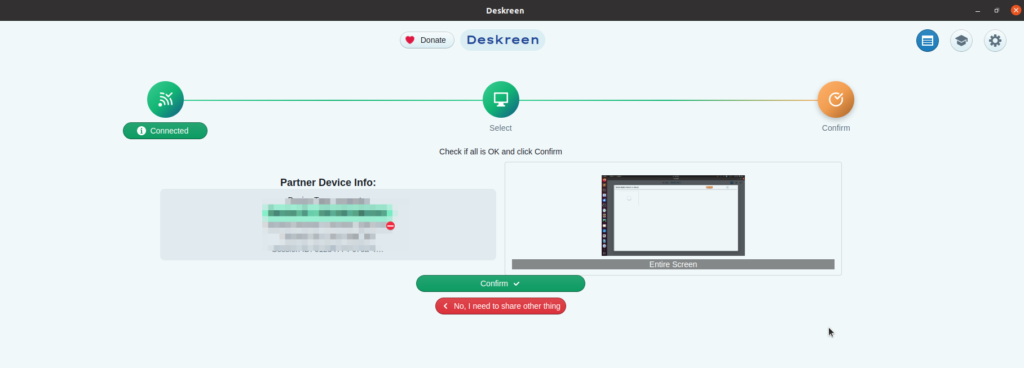
On the display device, open a browser and go to the URL Deskreen shows to see the screen. Since they are on the same network
There is a bit of a lag, but it works well for temporary display or quick office setup. Where your friend is connected to a dummy display, but you can't. Stream to him, and he can display. I use it sometimes to watch code and documents on a bigger screen. Deskreen allows any computer, mobile phone, or tablet to work as a second monitor.
Hacks
Of course, if you don't want to install this application, you can use ffmpeg or VLC to stream your screen to an RTSP server, and on the second display, you can watch it like a video. This would need a server; in the case of Deskreen, Deskreen will also work as a streaming server.
My monitor pack usually contains a Virtual Display Adapter, a Miracast device, portable monitors, and standard cables. This will allow me to go wireless or wired based on situations; what's in yours?


1 Response
[…] wrote a blog post about the Wireless Monitor Setups I use on the […]